UPDATES:
September 25, 2006 - Updated with information about using the FireWire interface to transfer video to a PC and make DVD's.
June 8, 2005 - Updated with information about a repair required after only a few months of ownership and light use.
Over the last two and a half years, I have reviewed a number of pieces of home theater equipment, including a surround sound processor, several DVD players, a couple of subwoofers, a television, and even a universal remote control. All of it stems from a home theater hobby that I've had since the mid to late 1990's. When I was much younger, though, my family was one of the first that I knew to have a video camera – originally a behemoth of a two-piece system from very early 1983, and later a Panasonic Super-VHS camera that my dad still has. With the impending growth of our own family, my wife and I decided that it was time to plunk down a little money on a video camera as a shared Christmas gift.
Initially, I looked at the crop of DVD-RAM based cameras, which use a 3" recordable DVD to store video. This was a very appealing option because of our hard drive equipped DVD recorder: we could toss the expensive DVD-RAM disc in the player and dump the contents onto the hard drive before burning video to a much less costly DVD-R and re-using the DVD-RAM. These cameras are still a bit on the pricey side, however, and some reviews indicated that they were struggling with battery life and some other performance issues, so I turned my attention to MiniDV. With MiniDV, there is a wide range of product options: manufacturers have been refining consumer-grade MiniDV cameras for a number of years now, and in many cases the entry-level models will offer a very respectable array of features along with video and audio quality that is well suited to typical family videos. As you step up to higher end models, you see a wider range of features (effects, editing options, external microphones and lights) and improved video and audio quality. My shopping focused on cameras near the entry-level range that offered analog video outputs (for transferring video to the DVD recorder), ease of use, and decent quality. The higher end models (some of which use 3 CCD chips rather than the single larger chip used in the entry level models) add features and superior video quality, but our needs did not make those features or improved video quality worth the added cost.
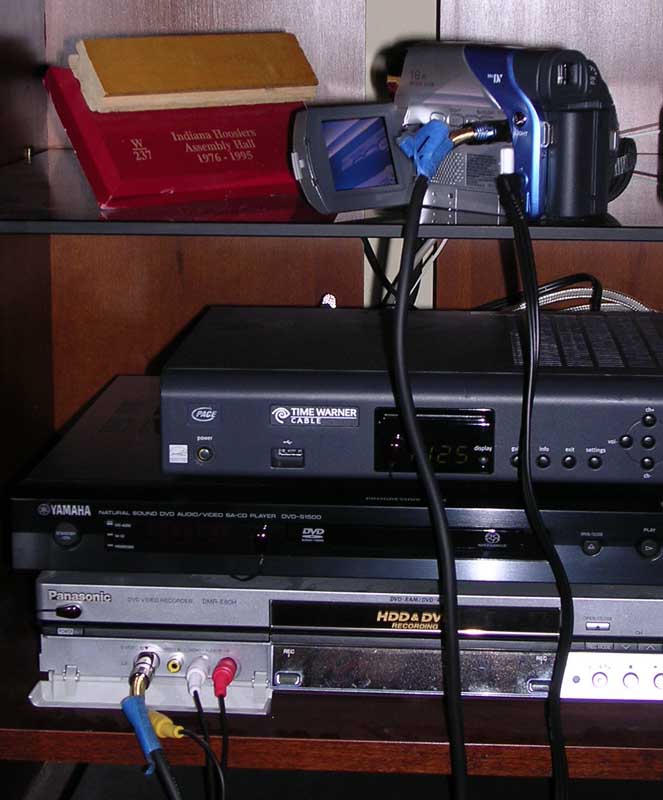
I've included an equipment list for my system at the end of this review as a reference.
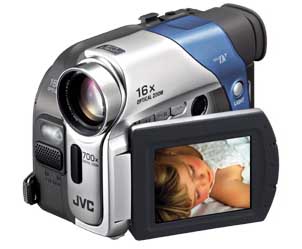
While shopping for a MiniDV camera, I fairly quickly focused in on the entry level offerings from Canon and JVC. Canon's basic cameras (the ZR80 and ZR85) and JVC's GR-D33 were all candidates. My wife and I looked at the Canon cameras at a CompUSA one weekend and thought that the controls were straightforward and clear. The JVC is similar, and in fact my wife preferred the JVC's spring-loaded toggle zoom control to the paired wide angle and telephoto buttons on the Canon cameras. Both brands offered certain strengths and weaknesses. The Canon cameras came with good lenses and hand straps that were well-regarded in some online reviews, but they lacked s-video outputs and built-in lights and their low light operation was not particularly good. The JVC offered an s-video output, built-in LED light, and excellent low light performance, but it had a strap that at least one online reviewer considered cheap and it lacked a hot shoe for adding a separate light. Battery life was slightly better with the Canon cameras, but in both cases the stock battery was limited to little over one hour with the LCD display open. The JVC was also available online for a few dollars less than the ZR80 and about $35 less than the ZR85. In the end, we went with the JVC GR-D33 and ordered it from Abe's of Maine as part of a basic bundle.
The GR-D33 is a fairly typical MiniDV camera, with a good core array of features. These features include:
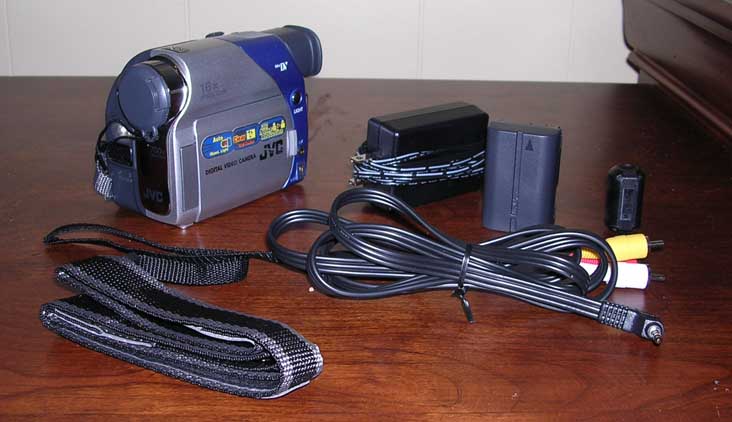
The camera comes with a standard battery, AC adapter, A/V cable (with stereo audio and composite video connections), a core filter for use with an s-video cable, a shoulder strap, a lens cap, and a CD-ROM with some computer software. In addition to these goodies, the package we bought from Abe's of Maine included a carrying case, UV lens filter (for outdoor shooting), and three tapes. I also dug out a spare s-video cable so I could make use of the s-video output. The camera that Abe's of Maine sent me had been opened before (brown packing tape around the bubble-wrapped camera and bubble-wrapped accessories, lens cap already attached to the camera, etc.), as if it was a returned unit or a display model. I sent them an e-mail about this, which was returned inviting me to call their call center (which, like many others, has been outsourced to India). After about 15 minutes on hold, I spoke to a customer service representative; he informed me that they had instituted a holiday policy of opening all products and testing them to make sure they were working properly. This is actually a pretty smart move, as I'm sure it cuts down on their returns and is likely to reduce the number of customers who end up grumbling about products that arrive DOA, but I would have recommended a note to round out the testing process. Something along the lines of "Inspected by Abe's of Maine" could have saved some confusion. The camera itself feels pretty comfortable in the hand. It is more difficult to keep steady than a shoulder-held camera, but nothing a little practice and care can't overcome. The lens cap has a small clip that allows it to "park" on the front of the hand strap, which is a nice touch.
The GR-D33 weighs about the same as any comparable camcorder, tipping the scales at around 1.1 pounds without a battery or tape and 1.3 pounds with a tape and standard battery on board. The camera will charge attached batteries when plugged in to the included AC adapter, although charging only takes place when the camera is off. You can also buy a third party rapid battery charger (many of which will also work from a car's 12VDC power socket) and additional batteries if you want, and at the very least an extra battery is probably a good idea. I ordered a 2-hour battery straight from JVC to provide backup for the included 1-hour battery – surprisingly, the JVC Accessory Store had some of the best prices around, although the 2-hour battery (BN-V416U) was backordered a couple of weeks.
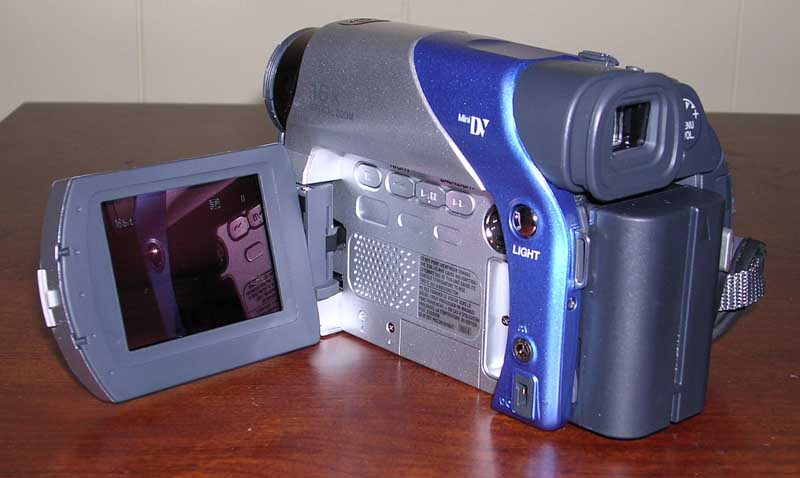
Before getting too far with the camera, it is worthwhile to take a look at the settings available in the camera's menus. The GR-D33 offers separate menus for Automatic mode, Manual mode, and Playback mode. The modes are selected using the multi-position power switch on the right rear of the camera (options are Manual, Automatic, Off, and Play), and some menu items appear in more than one mode. To enter the menus, you push down on a scroll wheel at the top rear of the camera, to the right of the viewfinder. Navigating through the menus is done using that same scroll wheel. In Automatic mode, there are only a few options: record speed (SP or LP, for 60 minutes or 90 minutes of recording on a 60 minute tape), sound mode (12 bit or 16 bit, where 12 bit allows audio dubbing while 16 bit offers "CD quality" sound), zoom (no digital zoom allowed or one of two levels of available digital zoom), snap mode (for recording still pictures as video "snapshots"), and gain up (for control of brightness gain options). In Manual mode, many more control options are available, including disabling digital image stabilization, enabling tele macro (to allow the camera to focus on objects as close as two feet from the lens as compared to the standard three and a half foot minimum distance), wide mode (for standard 4:3 recording, widescreen letterboxing, or anamorphic squeezing), and wind cut (to help reduce wind noise in the audio recording). Other Manual menu settings apply to playback mode as well: system beep, whether or not remote control operation is allowed (the default is "on" but the manual recommends it be changed to "off" for the GR-D33), a demonstration mode, display priority between LCD monitor and viewfinder, and reset. Camera display options include brightness adjustment, the option to overlay the camcorder's display on just the LCD or on the LCD and the video output, date and time display, time code, and clock adjustments. Entering the menu while in Playback mode offers access to many of the same menus as in Manual mode, plus a few playback-specific controls for sound mode (stereo, left only, or right only) and narration (for dubbing audio over the original audio recording). Most of these options can be left on their default settings. I did set the sound mode to 16 bit since I don't plan to do any audio dubbing. I also left the "gain up" option in its default position initially, although I plan to experiment with it a bit. The menu interface (scroll wheel that doubles as button) is simple and fairly effective, although not as intuitive as menu navigation buttons since the scroll wheel looks more like a focus or volume control knob (both of which are also functions to which it is assigned in some cases). I've seen similar interfaces before (my Panasonic Super-VHS VCR uses a scroll wheel/button combination on the remote for menu navigation), and they always feel somewhat unsteady. For a limited-space application like a camcorder, the scroll wheel is a sensible solution, and it makes accidental menu changes unlikely, but it wasn't exactly my favorite feature on the camera.
While perusing the menus, you will spend a good bit of time looking at the LCD monitor (unless you elect to plug the camcorder into a TV), as the viewfinder is far too small for this sort of work. This offers a good chance to get familiar with the monitor. Using the monitor does cut into battery life, but it also makes filming a good bit easier, so most people will rely heavily on it. Following the well-established pattern for palm-held camcorders, the GR-D33's LCD monitor flips out perpendicular to the camera on the left and can be rotated freely around a swivel point. The range of rotation is from 90° down (so the screen faces the floor) to 180° up (so the screen faces forward). When rotated 180° up, the image flips over, making it appear upright to someone standing in front of the camera. While in this position, the screen can also be folded flat against the side of the camera. When folded flat, the latch partially engages, which worried me a bit the first time since the release is on the back of the screen at that point, but it doesn't fully engage and readily swings back out. This range of movement is standard for any modern palm-held camcorder, and the GR-D33 fortunately does not deviate from the standard.
JVC, like many manufacturers, often uses the same basic chassis for several different models, adding features to the core as you move up the product line. The GR-D33 is the most basic of three cameras to share this chassis, with the GR-D73 and GR-D93 adding features such as a USB interface, support for still photography to an SD or MMC card, a remote control, and a larger CCD chip for the GR-D93. The GR-D33 appears to retain the remote sensor shared with its bigger siblings, but does not include the remote itself. For most things, the remote is unnecessary as the camera is already in your hand, but there could be instances (mainly when playing back your recordings) where a remote control could be handy. I considered grabbing my universal remote and doing a little experimenting, but after skimming through the manual and doing a few searches at the Remote Central forums I was unable to turn up any likely codes to try. There are a number of VCR codes listed in my MX-500's manual, which I may try at some point. JVC's online store also sells replacement remotes for the GR-D73 and GR-D93 for a little over $16, so GR-D33 owners can pick up one if they want to.
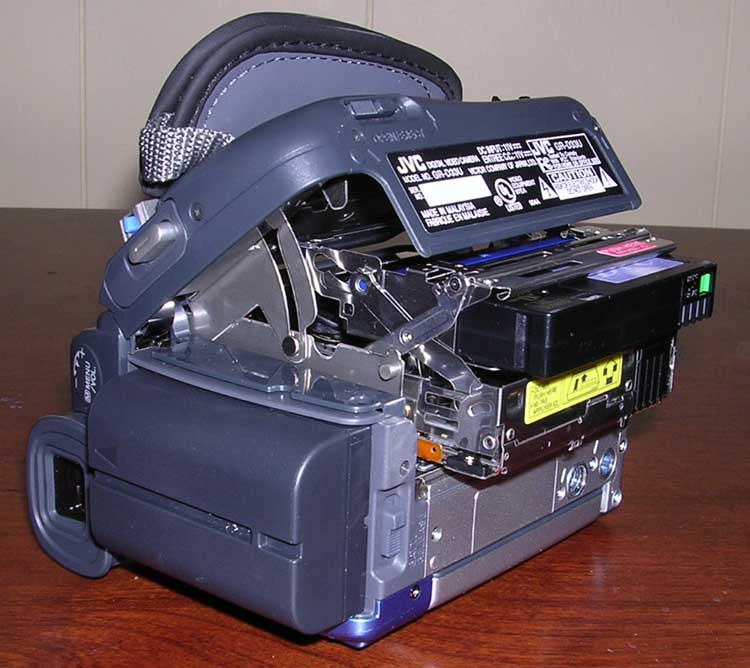
MiniDV camcorders carry on the longstanding tradition (broken only recently by the handful of DVD-based camcorders that have appeared on the market) of recording to a cassette tape, making the camcorder perhaps the last major segment of the consumer electronics industry to make effective and widespread use of a tape format. The MiniDV tapes are much smaller than traditional video tape, being a little over two and a half inches wide, less than two inches deep, and only half an inch thick. As with basically all MiniDV cameras, the tape loads on the right side, under the handgrip. Whereas many brands load from the top of the camera, the GR-D33 loads from below. This arrangement could potentially interfere with changing tapes while the camera is mounted to a tripod, which is exactly what happens with my tripod. The tape mechanism extends below the camera before popping the tape upward (triggering all sorts of flashbacks to the top-loading VCR's of yesteryear), and that mechanism runs smack in to the tripod's platform before it fully extends. Some tripods may make allowances for this, but as my tripod is a fairly generic brand I suspect that most will exhibit the same problem mine does. Before using the GR-D33, I thought that the top-loading approach was more logical and user-friendly than the bottom-loading approach used by JVC. Having now used a bottom-loading camera, I still think the top-loading approach is more conducive to changing tapes on the fly while the camera is being hand held, not to mention being significantly more compatible with tripods.
This is the underlying reason any camcorder exists: recording. Once we pop a tape into the camera and hit "record" it needs to be able to record audio and video as realistically as possible. In order to evaluate the camera overall, there were a few different general conditions that I wanted to test: indoors with a range of lighting levels, outdoors in bright daylight, and outdoors in low light. Bright scenes are generally easier for any camera, although they can pose a few challenges. Low light conditions either indoors or outdoors are more challenging and more often a source of trouble for cameras.
To get a feel for how the camera might perform under normal indoor conditions, I shot some video around the house both with the lights on and under some poorer lighting conditions. We bought this camera largely because of the baby that will soon be rattling around the house, and I suspect that much of the video we will shoot in the next few years will be around the house and the yard, so it is an ideal test as far as our needs are concerned. The LED light will turn itself on automatically under certain low light conditions, and when that happens the light is somewhat helpful. There is also a button on the left rear of the camera that turns the light on, but doing so causes the recording video quality to deteriorate significantly (noticeably reduced frame rate and poorer small object detail). In general, it seems wisest to let the light come on automatically or disable it entirely. The video quality was better than a VHS camcorder, but when viewed up close on an HDTV display it did show its digital roots: a few artifacts can be seen. These artifacts will not generally be noticeable on the average standard definition display, but a trained eye will see them when the recording is viewed on a high definition monitor, especially on a larger screen. The single CCD chip does a respectable job, but you can see where prosumer grade cameras could do better.
As a continuation of the indoor testing, I tried the camera outside under low light conditions. This is potentially the most challenging situation, since the built-in light can't provide much help in a large area. When venturing outside around sunrise on the shortest day of the year, I wandered around the driveway and deck for a bit, and the results were better than I had expected. The LED light was just as ineffectual as would be expected, but the camera really didn't need it to provide a good picture. It was able to rely on the natural ambient light of early morning to give very good video quality. I wouldn't try to shoot any useable footage at midnight unless there are some lights in the area, but that would be true of any camera. Overall, low light outdoor performance turned out better than I had expected.
Just to round out my video tests, I plan to test the camera under outdoor daylight conditions only briefly, as this is possibly the easiest situation for most cameras to deal with. Color rendering looked accurate and the camera performed well under typical daylight conditions. The kit from Abe's of Maine included a UV filter, which was suggested for use outdoors. The filter seemed to make little or no difference on video quality, although it could act as an extra bit of easy-to-clean lens protection.
While I looked at all of the basic types of situations likely to be faced by this camera, I did so primarily from the perspective of an average user. I didn't expect professional or even prosumer grade performance from a camera costing less than $300, but I still wanted to know just how much it was capable of. I also wanted to get a feel for how stable and comfortable the camera was while in use. Like all of today's consumer-grade camcorders, the GR-D33 is very small, but it is also possible to shoot smooth, stable video with it with only a little care. The zoom control allows variable speed control depending on how far to one side or the other you move the toggle, and the toggle has just enough stiffness to provide good control of this movement. This gives you the ability to prevent those stomach-wrenching sudden zooms from wide to very close up, making the recording much easier to watch. The controls felt well laid out in general, although turning the power control to the playback position can be slightly cumbersome. Video quality overall is satisfactory, if not exceptional. Outdoor performance was probably the best, although under at least average light levels the camera did a respectable job with indoor conditions. Upgrading to a 3CCD camera will provide an improvement in picture detail, but the difference will probably only be noticeable on larger displays (particularly HDTV displays).
The GR-D33 offers several different ways to play back your video: using the camera's little 2.5" LCD monitor; using the analog audio/video outputs to feed a TV or separate video recorder; and using the IEEE-1394 FireWire output to transfer the digital video to a computer or separate FireWire equipped recorder (typically DVD-R or Digital VHS). Since my DVD recorder and PC both lack FireWire, I did not investigate that option, but I did test the other methods. The camera comes with a special audio/video cable (3.5mm mini-plug to composite video and stereo analog audio) but does not have an s-video cable or FireWire cable, so if you plan to use s-video (as I did) or connect the camera to a PC you'll need to chase down the appropriate cable.
The simplest method of playing back your recording is using the built-in LCD monitor. As mentioned in the setup section above, you can orient the monitor in a number of different ways, so it is possible to have the monitor's panel tucked back against the body of the camera and watch it like a very tiny TV if you want to, but the screen ends up covering the transport controls when you do so. Other models include a remote control, but without one you're forced to flip the panel back out to reach the controls. When folded back, the panel will also cover the speaker, so the audio may end up a bit muffled. With the panel flipped out, the speaker (located directly beneath the transport controls) provides weak but functional audio. The speaker is still active when playing back with the LCD panel folded in, and while the panel does muffle the sound somewhat it is not enough to hinder use. The video quality is as good as you will get from a 2.5" screen: it's easy to see what's going on, but it's not going to be useful for showing footage to more than one or two people. I find it most convenient to set the camera on the top shelf of the entertainment center with the LCD monitor flipped out to the side while dubbing video to DVD-R, as it lets me watch something else on TV and still monitor the dubbing process. Otherwise, I will only use the LCD monitor for briefly reviewing video right after I've shot it.
One reason that I elected to get the GR-D33 instead of one of the comparably priced Canon cameras was the video output options. The GR-D33 includes stereo analog audio output and either composite or s-video video output, which can be connected directly to a TV for playback. This will not work with all TV's: older sets may only offer an RF coaxial input, in which case the GR-D33 would need to be connected through a VCR or an RF modulator. (See my Cables and Sample Wiring Diagrams pages for more information if you think your TV falls into this category.) Since my TV includes front audio/video inputs, it is a simple exercise to connect the camera and switch the TV to that input. It is worth noting that the standard audio/video connections can be made with the screen folded shut, but the s-video output is behind the screen. This means that you won't be able to fold the screen in while using the s-video output. Since the transport controls are right next to the s-video output in the area covered by the screen, that didn't bother me. I've been using a 32" HDTV for over six months now, and have learned first-hand two truths of HDTV (these also can be extended to standard definition big screen TV's to a lesser degree): good source material can look spectacular, and weaker source material will tend to reveal its flaws prominently. Watching the GR-D33's output within arm's reach of a 32" HD screen is an excellent way to see the limitations of a sub-$300 camcorder. The picture looks a good bit more presentable from a normal viewing distance. The difference between composite and s-video inputs on the TV was almost insignificant, so at least for the TV's front inputs the value added by the s-video port is marginal. When using the camera's audio/video outputs, the built-in speaker will be muted – a feature that I appreciated, but that some other cameras lack (at least some Panasonic camcorders, including their 3CCD models, leave the speaker active even with the audio output connected). I tried this once just to see how it looked, but in most cases I connect the camera to our DVD recorder as described below.
The most often used method of playback for me will be connecting the camera to a VCR or DVD recorder. Standalone MiniDV cassette players do exist, typically including support for VHS or even S-VHS in the same unit, but they are expensive and hard to find. Abe's of Maine, the company that I bought the GR-D33 from, carries exactly two such units, both made by JVC and both priced between $700 and $800. In many cases, camera owners will choose to transfer at least some of the video they shoot to a more readily accessible format such as VHS or DVD-R. Any VCR will include at least a composite video and mono audio input, and hifi VCR's will include stereo audio inputs. S-VHS VCR's and DVD recorders will generally include an s-video input, as well. In my case, the DMR-E80 includes a convenient front input with s-video and stereo analog audio, which is the input that I will use to transfer video to the E80's hard drive for editing and archiving to DVD-R. As with the TV, the s-video signal was only marginally (if any) better than the composite video. There was no noticeable difference between the playback through the E80's front input and the TV's front input. Since the videos that will be shot with this camera will end up being saved on DVD-R using the E80, I took a moment to transfer my sample footage to the hard drive and burn it to a DVD-R just to see how the video and audio transferred. As with recording television programs and archiving old VHS and S-VHS movies, I used the E80's "SP" recording mode (which allows for approximately two hours of video to be saved onto a DVD-R). Transferring from camera to recorder is a straightforward process, and editing the resulting program on the DVD recorder was easier than editing VHS transfers (transitions between sections of the recording are somewhat more cleanly defined). After being transferred to DVD-R, the recording appeared undiminished from the direct playback to the TV's front inputs or the DVD recorder's front inputs. Relying on the camera's IEEE-1394 FireWire output to transfer recordings to DVD would be the optimal route, as that would eliminate the need for a digital-to-analog conversion out of the camera and an analog-to-digital conversion when recorded to the E80's hard drive, but the camera and recorder both do a good enough job of handling those conversions to prevent noticeable losses.
With the exception of people using FireWire to download digital video to a computer and the handful of people with standalone MiniDV players, camcorder owners routinely use their cameras to watch the video they've recorded. Because of this, playback performance is an important factor. It becomes difficult to separate playback from recording when it comes to a camera's analog outputs, since the two are both integral aspects of the signal path. As I mentioned in the recording section, the GR-D33 is exactly what its price tag suggests it to be: an inexpensive camcorder. The video quality reflects that. Getting too close to a large display will make the camera's limitations painfully obvious, but at normal viewing distances and for simple home movies the GR-D33 is adequate.
Update 9/25/2006 – FireWire: Around May 2006, I picked up an IEEE-1394 FireWire controller card for my PC for about $30 or so. A new DVD burner and an experiment earlier in the year with DVD authoring software had given me the idea of trying to make use of my camcorder's FireWire port. This proved less straightforward than I'd originally hoped. I did track down the software CD that came with the camera, but the included software wasn't the friendliest. I also stumbled across Windows Movie Maker (a video application included with Windows XP), which was able to let me copy the DV video from the camera to a 100GB SATA hard drive. I left the video in its native DV-AVI format, which produced a roughly 13GB file for a single one-hour tape. One nice aspect of this was that Movie Maker retained breaks between each segment of video as well as date/time stamps for each of these segments. This allowed me to organize and annotate the video within Movie Maker. Unfortunately, I couldn't produce a DVD directly from Movie Maker or even import that 13GB AVI file into a DVD authoring program. Instead, I first had to convert the AVI to an MPEG2 format that was compatible with DVD's. The solution was to first save individual AVI files for each segment that I wanted to store separately on the DVD then to convert each of these smaller AVI files to MPEG. The first step was to create a separate AVI file for each segment, done by dragging the segment to the layout section at the bottom of Movie Maker and saving that to a new file. When saving the file, I chose to save it to my PC and then to output the data as a DV-AVI file. Once I had those files, I used a separate program (TMPGEnc Plus) to convert each one to an NTSC DVD Video file. The settings in TMPGEnc Plus that I found worked best were CBR (constant bit rate) linear PCM audio and a video bitrate of 4000kbps (roughly half of the original bitrate). This reduced bitrate did not provide any noticeable change in video quality, but it allowed me to fit about two hours onto a single-layer DVD-R. TMPGEnc Plus produced two files, one MPEG file for the video and a separate WAV file for the audio. These two files could be imported into the DVD authoring software that I have been using (DVD Author). Once the video was imported, I edited the track's audio settings to force it to re-encode the audio as Dolby Digital 2.0, which takes a good bit less space than PCM audio does. At that point, I could dress things up on the player however I wanted: each imported file was automatically a separate chapter on the disc, and I could create "tracks" (which are actually titles on the final disc) to collect the data as needed (such as by the month it was recorded, or the type of event, or any other arrangement that I liked). DVD Author allows the user to heavily customize the disc menu, even to the point of custom backgrounds, animated menus, and background audio.
Much like the Panasonic DVD-S35 DVD player that I reviewed here last year, the GR-D33 is really a very basic model. There are a number of features that it lacks – accessory hot shoe, memory card for digital still photography, remote control, USB interface – but the very reasonable price and solid offering of basic features makes it a compelling option for someone looking for a budget camcorder for home videos. The only question that I had going into the purchase was whether the camera could still provide those basic features without sacrificing quality and reliability. After using it for a bit, I found that the GR-D33 includes all of the critical tasks for a video camera, and in light of the price it performs those tasks quite well. There are some features missing, of course (no remote, no USB output, no memory card for storing still photos), but in our case we felt quite comfortable without them. In fact, by not having them it made the camera more accessible to my wife and to other family members who might be asked to pick it up, as the controls are kept as simple and straightforward as possible. Video quality is good but not exceptional, although I think the difference between the GR-D33's video quality and that of a more expensive camera would be difficult to discern from a normal viewing distance, particularly on standard definition televisions that still constitute the significant majority of TV sets. You can get superior picture quality (3CCD cameras in particular should offer greater small object detail) or additional features by buying a better camera than the GR-D33, but there is an associated cost in both cases – those better cameras will cost you several hundred more dollars, particularly for the improved video quality. The GR-D33 does exactly what it says it will do: offer reliable video and audio recordings in a small, lightweight, easy to use package.
Update 6/8/2005: A couple months ago, I went to use my GR-D33 and ran into an odd problem. The camera's viewfinder and LCD display both showed nothing but black and flashed a warning that the lens cap was still on. This is normal when you have the lens cap still on, but in this case the lens cap was off and clipped to the strap. No amount of fiddling, swapping batteries, or other coaxing could resolve the problem. Eventually, I found the time to get the camera to the local JVC certified shop, and in about a week they repaired it. The one-year parts warranty covered the required replacement (presumably related somehow to the CCD or associated components, although I didn't find out exactly what the culprit was), but the labor was $140 out of my pocket. Obviously, any product will experience a certain number of hardware failures, and the price for the GR-D33 clearly identifies it as the least robustly-built camera in JVC's line, but it was still a bit disheartening to have a hardware failure so quickly. We'll see how it holds up in the coming months and years.
EQUIPMENT LIST:
If you have any questions about this review, click here and I'll get back to you as quickly as I can.